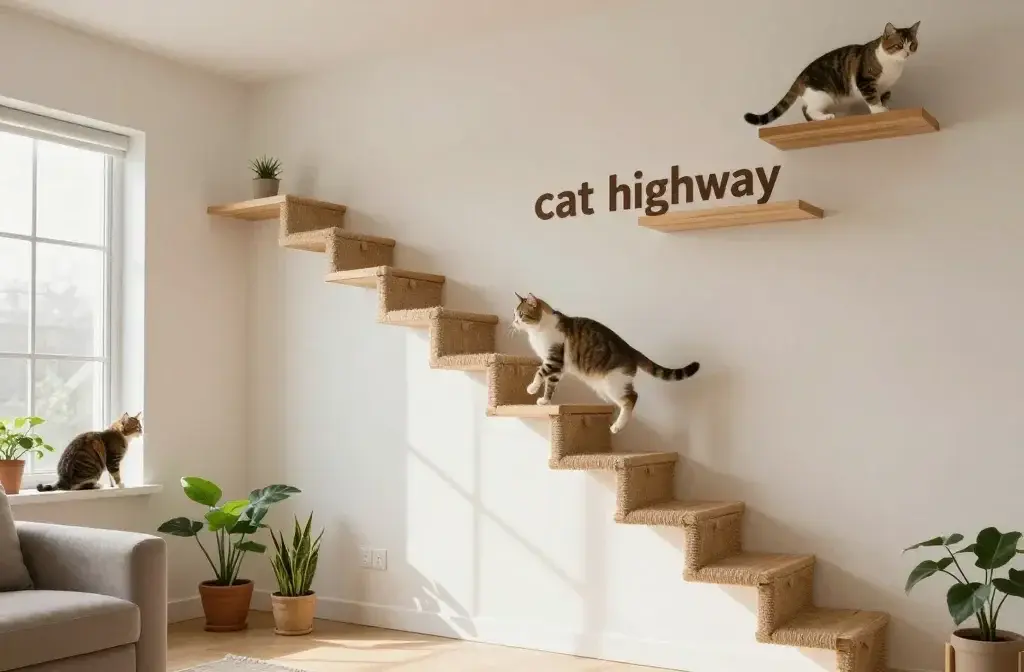
Your cat already owns the couch, the keyboard, and your dignity. Why not give them the walls, too? A DIY “cat highway” turns dead space into a feline freeway—perfect for zoomies, bird-watching, and judge-you-from-above time. You’ll boost enrichment, save floor space, and create something that looks cool in your living room. Ready to build the purrfect skyline?
Why Build a Cat Highway?
Your cat wants vertical space like you want a second coffee—desperately. Shelving lets them climb, perch, and survey their kingdom without knocking your plant off the windowsill. You also reduce territorial squabbles when you add levels—especially in multi-cat homes.
Bonus perks:
- Less boredom and fewer 3 a.m. zoomies (you’re welcome).
- Cleaner floors—no bulky cat trees in every corner.
- It looks awesome and doubles as decor.
Planning the Route: Height, Flow, and Safety
Think like a cat and a cautious engineer. You want an easy route up, a few lounge spots, and safe landings. Don’t just slap random boards on the wall and hope for the best—cats will use it daily.
Key planning tips:
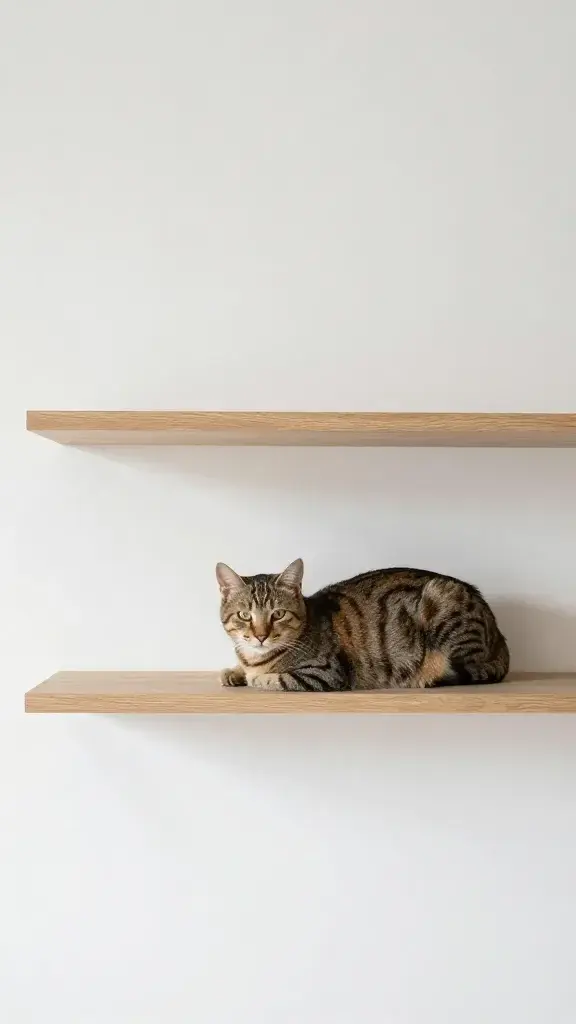
- Start low, end high: Create a staircase effect with 12–16 inches between shelves.
- Mind the gaps: Cats jump, not teleport. Keep horizontal gaps reasonable (18–24 inches).
- Safe landings: Leave a shelf near doors or windows for traffic and sunlight.
- Traffic flow: Add at least two ways to get down so no one gets trapped.
- Anchors everywhere: Always screw into studs or use heavy-duty anchors rated for the load.
Measure Twice, Meow Once
Use painter’s tape to map shelf locations on the wall. Watch your cat exploring with a chair or a test platform to see their comfort height. If your cat is older or chunky (no judgment), decrease distances and add ramps.
What You’ll Need (and Why)
You don’t need a woodshop. You just need a small stack of supplies and some confidence.
Materials:
- 1×10 or 1×12 pine boards (width gives stability and comfy loaf space)
- Metal L-brackets or floating shelf brackets (rated for 50+ lbs)
- Wood screws + wall anchors (if no stud access)
- Non-slip covering: carpet squares, cork, or textured shelf liner
- Stud finder, drill/driver, level, tape measure, pencil
- Sandpaper, wood finish or paint (pet-safe once cured)
Optional add-ons:
- Corner shelves to turn tight spaces
- Wall-mounted scratching posts for on-ramps
- Bridge sections or hammocks for drama
- A “parking spot” platform with a bolster bed
Choosing Brackets and Boards
Go wider rather than deeper—10–12 inches supports loafing and lounging. For brackets, pick ones with long arms that match shelf depth. And FYI: floating shelf brackets look sleek but require precise drilling and solid studs.
Design Ideas That Actually Work
You don’t need an architect’s degree. Just aim for a clear route with varied stops and safe turns.
Beginner-friendly layouts:
- Staircase wall: Three to five shelves climbing diagonally to a high perch.
- Window runway: Two long shelves flanking a window perch for sun naps.
- Corner climb: Alternating corner shelves that lead to a top platform.
- Loop route: A rectangular or U-shaped circuit so they can patrol and return.
Perch Placement Tips
Place one shelf near their favorite nap zone. Put one “sentry” spot where your cat can watch the front door. Avoid shelves above fragile decor unless you enjoy chaos.
Step-by-Step: Build Your First Section
Let’s keep it simple and solid. One short staircase, three shelves, one satisfied gremlin.
- Find studs: Use a stud finder and mark vertical lines with pencil.
- Cut and sand: Cut boards to 16–24 inches long. Round off sharp edges, sand smooth.
- Finish or paint: Apply pet-safe finish or paint; let cure fully (check VOC info).
- Add traction: Staple or glue carpet squares or cork to the top of each shelf.
- Mount brackets: Pre-drill into studs and attach brackets level and square.
- Attach shelves: Screw boards onto brackets from underneath.
- Test strength: Push down hard. If it wobbles, fix it now—not after your cat tests gravity.
Ramp Option
For kittens, seniors, or thicc kings, add a 6–8 inch wide ramp at a gentle 20–30° angle. Cover it with sisal for grip and bonus scratching.
Safety First (Because Cats Don’t Read Manuals)
Cats feel invincible. Your shelves must prove them right.
Non-negotiables:
- Studs or heavy-duty anchors: No exceptions.
- Traction: Smooth wood equals slip ’n’ slide. Always add grip.
- Clearance: Leave 12 inches of headroom above each shelf.
- No wobble: Tighten everything. Re-check monthly.
- Safe finishes: Use fully cured, non-toxic finishes; avoid strong fumes during curing.
Multi-Cat House Rules
Add passing lanes. If one cat loves drama, give two routes up and down. Include at least one big platform where two can lounge without touching whiskers, IMO a peacekeeping must.
Make It Look Good (So You’ll Actually Keep It)
You can build a highway that blends with your style, not fights it.
Style ideas:
- Match the room: Stain boards to match furniture or paint them the wall color for stealth mode.
- Layer textures: Cork on light wood feels modern. Carpet tiles add color pops.
- Hide brackets: Use floating hardware for a cleaner look—just commit to stud placement.
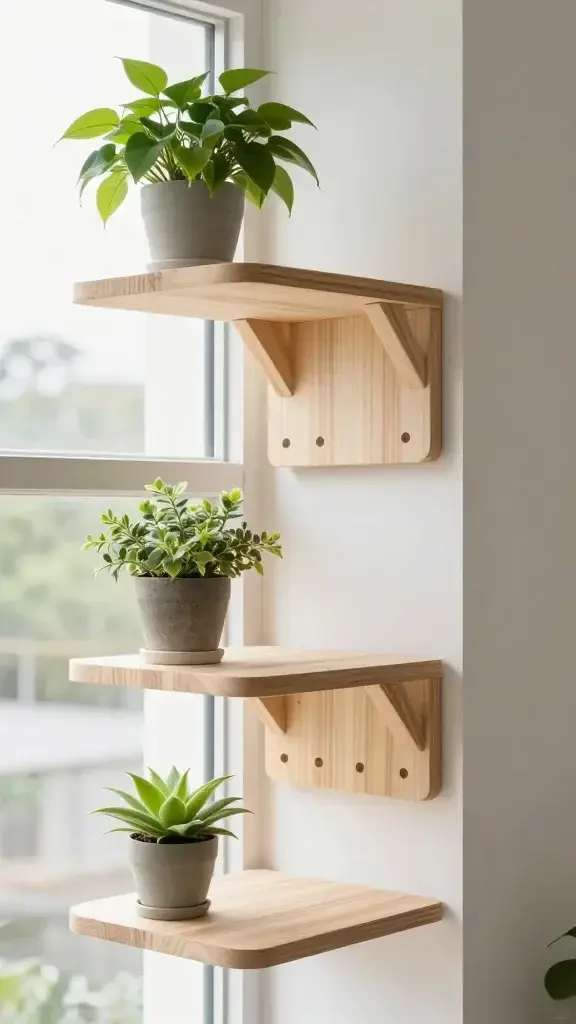
- Add plants (carefully): Cat-safe trailing plants near shelves create a jungle feel. Keep toxic plants far away.
Enrichment Extras
Mount a small toy hook under one shelf for dangling play. Place a treat dish on a high perch for “summit snacks.” Rotate toys weekly so your cat doesn’t yawn at your efforts. FYI, catnip on that top platform? Instant fan club.
Training Your Cat to Use the Highway
Most cats will leap up like they’ve always lived there. Some need a pep talk.
Encouragement tips:
- Use treats to lure them one shelf at a time.
- Place a favorite bed or blanket on the top perch.
- Start with lower shelves, then build higher once they show confidence.
- Never force them up. Curiosity wins eventually.
FAQ
How much weight should each shelf hold?
Aim for at least 25–30 lbs per shelf to cover any cat plus their landing impact. If your cat is a power jumper, build for 40–50 lbs and sleep easy. Heavy-duty brackets and stud mounting make the difference.
Can renters do this without losing the deposit?
Yes. Use shelves mounted into studs with minimal holes and keep touch-up paint handy. Alternatively, build a floor-to-ceiling tension-post highway or a leaning ladder system with platforms—no wall holes required.
What’s the best material for traction?
Low-pile carpet tiles, cork, or rubberized shelf liner all work great. Avoid fluffy shag that catches claws. Glue or staple the material securely, and replace it when it wears down.
Is pine strong enough, or do I need hardwood?
Pine works perfectly for short spans and proper bracket support. If you want extra durability or longer spans without sag, upgrade to birch ply or oak—but your cat won’t care either way, IMO.
How high is too high?
Top perches around 6–7 feet feel exciting without risking scary falls. If you go higher, add more intermediate steps and a plush landing zone below. Avoid shelves directly over breakables or hard-edged furniture.
How do I keep it from looking cluttered?
Stick to one or two finishes, align edges, and keep consistent spacing. Hide clutter by integrating a few closed storage cubes beneath the route. Symmetry helps, but a clean repeating pattern helps even more.
Conclusion
You can absolutely build a cat highway without a workshop or a meltdown. Plan a simple route, use sturdy brackets, add grippy surfaces, and watch your cat transform into a smug wall gremlin. Start with three shelves, learn what your cat loves, then expand. Before you know it, you’ll both be looking up more than ever.