You love your cat. You love your walls. Your wallet?
Not so much. Good news: you can build sleek, sturdy, Instagram-worthy cat wall shelves without lighting your budget on fire. Grab a drill, a cup of coffee, and your chaotic feline supervisor—let’s make vertical cat heaven happen.
Why Cat Wall Shelves Rock (For You And Your Cat)

Your cat craves vertical territory because… cat.
They feel safer, they survey their kingdom, and they get stress-free exercise. You get more floor space and fewer zoomies across your face at 3 a.m. Everybody wins. Bonus: Wall shelves turn awkward empty walls into a custom playground.
And you can build them for a fraction of what boutique pet stores charge.
Plan the Playground: Layout, Flow, and Safety
Start with your cat’s vibe. Do you have a cautious loaf or a parkour prodigy? The answer decides spacing and height.
- Map the route: Sketch a path across the wall: up, across, down.Include a “rest stop” every 18–24 inches.
- Height matters: Beginner cats feel comfy around 3–4 feet high. Confident climbers? Go up to 6–7 feet with multi-step routes.
- Landing zones: Always give a safe “exit ramp” down to furniture or a low shelf.
- Avoid hazards: Keep shelves away from picture frames, plants, and your prized glass vase.Obviously.
Spacing 101
Most cats handle 12–18 inches between shelves. Kittens and seniors prefer closer spacing. If you have a chonk (no judgment), choose wider, deeper shelves with shorter jumps.

Budget-Friendly Materials That Don’t Look Cheap
You don’t need fancy hardwood.
You need strong, safe, and easy-to-clean.
- Shelves: 1×10 or 1×12 pine boards (cheap and sturdy), or pre-cut MDF shelves (coat edges well).
- Brackets: Heavy-duty L-brackets rated for at least 50 lbs each. Overkill? IMO, that’s the point.
- Fasteners: 2.5–3 inch wood screws for studs.Drywall anchors only if you absolutely must—go heavy-duty toggle style.
- Traction: Carpet tiles, sisal rope, cork sheets, or anti-slip stair tape.
- Finishes: Non-toxic water-based polyurethane or paint. Cats lick things. Plan accordingly.
Where to Save vs.
Where to Splurge
- Save: Basic pine boards, secondhand brackets, leftover carpet tiles.
- Splurge: High-load anchors or quality brackets if you can’t hit studs. Traction material that actually grips.
Tools You Actually Need
You don’t need a woodshop—just a few basics.
- Drill/driver with bits
- Stud finder (a real one; your cat doesn’t count)
- Level (laser if you’re fancy, bubble if you’re normal)
- Measuring tape and pencil
- Hand saw or circular saw (hardware store can cut boards for you—FYI)
- Sandpaper (120–220 grit)

Build Steps: Simple, Safe, Solid
You can knock out a set of three shelves in one afternoon. Here’s the plan.
- Cut and sand: Cut boards to 10–14 inches deep and 16–24 inches wide.Sand edges until smooth.
- Finish the wood: Paint or seal with water-based poly. Let dry fully. Your cat will test it with paws and judgment.
- Add traction: Staple or glue carpet tiles or cork on top.For rope, wrap and staple underneath every few inches.
- Find studs: Mark stud locations at your planned heights. Aim for two studs per shelf if your span allows.
- Mount brackets: Level and screw brackets into studs first. Use two screws per bracket minimum.
- Attach shelves: Place boards on brackets, pre-drill, then secure with short screws from below.Check for wobble.
- Stress test: Press down hard, lean on it a bit, and give a few gentle shakes. If it moves, upgrade anchors or reposition.
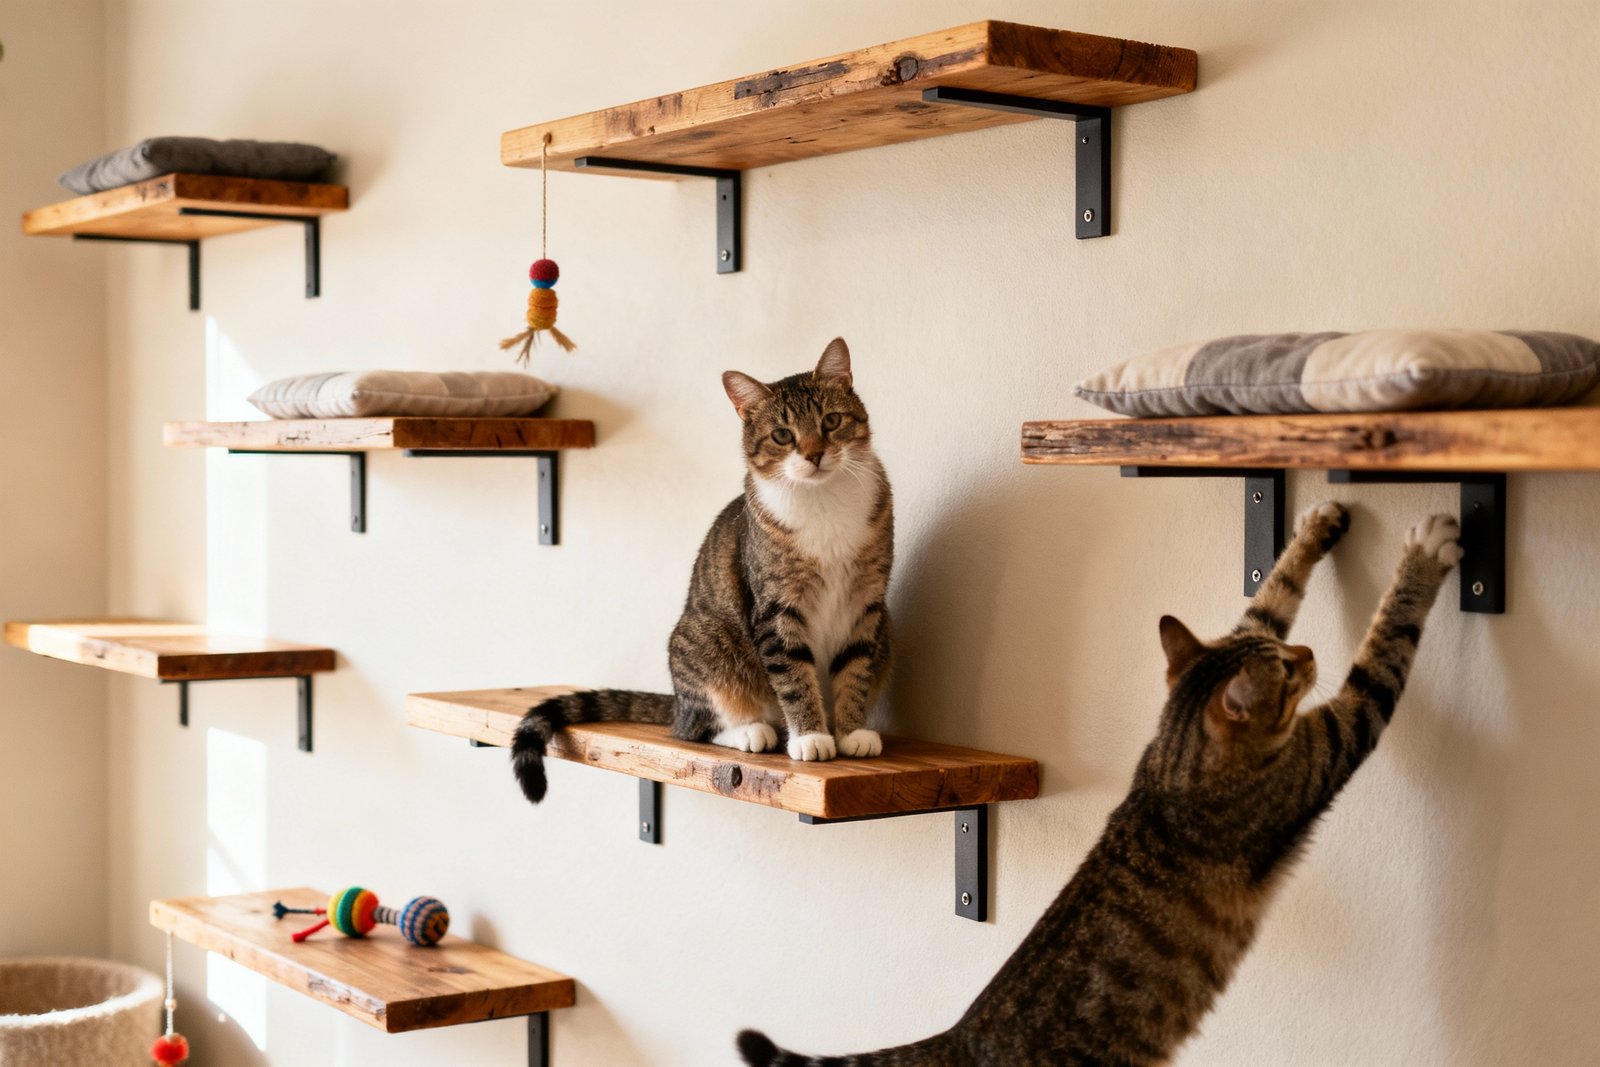
Layout Ideas That Look Good
- Stair-step: Diagonal climb up to a window perch. Simple and cute.
- L-Route: Vertical ladder plus horizontal runway along the wall.
- Bridge setup: Two shelves connected with a rope or wood bridge (add side rails for safety).
- Reading nook combo: One cat shelf above a chair so you both get cozy.
Safety Tips You Shouldn’t Skip
Safety talk isn’t glamorous, but vet bills aren’t either.
- Studs first: Whenever possible, mount into studs.Drywall alone won’t hold a zooming 12-pound missile.
- Weight rating: Choose brackets with at least 2–3x your cat’s weight. Big cats need wider shelves (10–12 inches deep).
- Rounded edges: Sand corners so no one snags a paw or a hoodie string.
- Non-slip surfaces: Flat wood looks nice; your cat will slide like a curling stone.
- No wobbles: If it shakes, your cat won’t trust it. Tighten hardware and add a third bracket if needed.
Multi-Cat Diplomacy
If you’ve got a spicy duo, create multiple routes and separate “high thrones” so one cat can’t gatekeep.
Provide a second exit path so no one gets cornered. Yes, cats play politics.
Style On A Shoestring
Your shelves can look custom without custom prices.
- Match your decor: Paint brackets the wall color for a floating look, or go black for an industrial vibe.
- Use fabric scraps: Upholster the top with durable fabric over thin foam for a cozy perch.
- Add a hammock: Stretch canvas between two shelves using dowels and screws. Instant nap trap.
- Thrifty hack: Repurpose old cutting boards or stair treads—already smooth and sturdy.
Costs: Realistic Budget Breakdown
You can build three shelves for less than a fancy cat tree.
Rough estimate:
- Pine boards: $12–25
- Brackets (6): $18–36
- Screws/anchors: $8–15
- Traction (carpet tiles or tape): $10–20
- Finish (paint/poly): $8–15
Total: About $56–$111 for three shelves. Cheaper if you already own screws and finish. Priceless if it stops midnight zoomies.
IMO, that’s a bargain.
Training Your Cat To Use The Shelves
Some cats sprint up immediately. Others stare like you installed tax shelves. Lure them.
- Treat trail: Place treats on each level, up to the “top bunk.”
- Catnip or silvervine: Sprinkle lightly on the surfaces.
- Start low: Add a temporary stepping stool or chair until they gain confidence.
- Play up there: Use a wand toy to guide them onto the route.
FAQ
How deep and wide should cat shelves be?
Aim for 10–12 inches deep for adult cats so they can turn comfortably.
Widths of 16–24 inches work well for perches. If you have a larger cat, go wider and deeper, or add guard rails for confidence.
Can I mount shelves without studs?
Yes, but use heavy-duty anchors rated well above your cat’s weight, and keep shelves shorter to reduce leverage. Toggle bolts or metal anchors beat plastic ones.
If possible, run a painted 1×4 ledger board into studs and mount shelves to that for extra security.
What’s the best surface for traction?
Carpet tiles grip well and clean easily. Sisal feels scratch-friendly but can fray—great enrichment though. Cork looks clean and adds grip but seal it to prevent staining.
Avoid bare glossy paint or smooth MDF on top.
How do I keep the shelves from looking messy?
Hide screws under the shelf, paint brackets to match the wall, and keep a consistent color palette. Use identical carpet tiles or matching fabric. A tidy layout (even spacing, aligned edges) reads intentional and stylish.
Will shelves damage my walls?
Shelves require holes, but you can patch later with spackle.
To minimize damage, mount into studs, use the fewest brackets needed for stability, and avoid over-tightening. The joy of watching your cat loaf five feet up? Worth a couple screw holes, IMO.
How do I clean and maintain them?
Vacuum surfaces weekly, especially if you used carpet or rope.
Tighten screws every few months. Replace worn traction materials before they peel. Quick checks keep everything safe and squeak-free.
Wrap-Up: Build It, Then Bask In The Loaf
You don’t need a luxury budget to give your cat vertical real estate.
With a few boards, solid brackets, and smart spacing, you’ll create a safe, good-looking climbing route your cat actually uses. Start small, tweak as you go, and enjoy the smug satisfaction of DIY done right—plus the A+ view of a happy loaf on the wall.